I am using Peco switch machines on my layout. They are extremely reliable and I have been very happy with them. One of the things I have always wanted is to remote control the switches using a control panel. I have built this successfully on my medium layout. I am trying a different approach, hopefully a better one, on the small layout that I’m currently working on. In this series, I’ll go through my experiences. The first part covers my experience with the medium layout and part 2 will cover the route I took with the small layout.
On the control panel, I used green LEDs to indicate the direction the switch is thrown. So on the schematic, there is a LED on each trailing point and depending on which way the switch is thrown, one of them is on. Here is the image of my control panel with the first switch controller installed:
To accomplish this, I used the Peco accessory controller PL-13. The wiring schematic that I used is this:

The red is the feed from the PSU. The blue and yellow wires close the loop for one or the other LED depending on the direction of the PL-13. The green wires represent the two positions for the switch and go from the SPDT to the PL-10 switch machine. Black wire represents the common return.
Below are two pictures of the real thing. This is a PL-10e switch machine connected to a mounting plate, with the PL-13 accessory controller glued to its bottom. In these pictures, the blue wires go to the LEDs, the yellow wires go to the SPDT that controls the switch and the red wire is the common return.


That was the easy part! I envisioned all of my switch machines to be mounted under the table, thus going for the PL-10e, which has the extended pin. Mounting this puppy was a nightmare! I have a plywood base on the medium layout, and the track is on WS bed. The mounting plate, plywood base and the roadbed add up to almost the exact length of the PL-10e pin! It reached the switch just barely, with no need for trimming.
Now getting the rod in the hole in the switch is one thing. Getting it lined up so it actually throws the switch reliably is another. The pin has just enough give in it that the switch would throw in one direction but not the other. After about half hour of trying to align this one thing with no success, I thought that maybe the switch was way too far down. So I took out the chisel and started carving into the bottom of the plywood base. Big mistake. That added yet another 40 minutes of frustrating tinkering. In the end, I just realized that the hole I had drilled for the pin just wasn’t wide enough. I had drilled a hole just big enough for the pin’s movement, but you really need something that is at least 1/2” in diameter.
After about an hour and a half, two hours I finally was able to align the switch machine just right. I forgot all the crazy stunts I pulled to get it right, but a picture is worth a thousand words. Here’s what the final contraption looks like under the table:

This is downright embarrassing. But, it is working! So, I’m not going to mess with it until it starts failing. Here’s a video of the control panel in action:

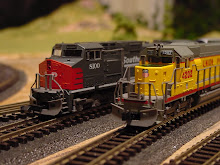
The end result is quite satisfying. However, all the issues I had with under-the-table mounting have been so frustrating that it has prevented me from attempting another installation. I’m going to experiment with directly attaching the switch machine to the switch on the small layout. Depending on how that goes, I may revisit the medium layout. That’s coming in part 2.


No comments:
Post a Comment