DISCLAIMER: This installation does not have a happy ending. I made a mistake somewhere and the lights on the engine no longer work. All other functions are working fine and I’m able to run and program the decoder just fine. But, the lights don’t work.
This was my first attempt at a DCC decoder installation on an engine. I have received a Digitrax DN163 decoder with the Zephyr Xtra set I had ordered, so I decided to use that one for it. If I were to do it all over again though, I would definitely go with the CN-GP decoder from TCS. The CN and CN-GP decoders are absolutely fantastic options for older engines that have separate light boards for the front and back.
Anyways, back to topic. The DN163 isn’t what you’d call a tiny decoder and on an engine the size of the GP-9, there isn’t really much room for it. So, I had to cut off a part of the frame, specifically the part that holds the rear light board in place. Once you remove that, there’s plenty of room back there. Here are the pictures of the modification.


With the frame modified, this is how I envisioned the decoder to fit:

After this point, there was a gap of almost 5 weeks until the soldering began. Unfortunately during this time, I dropped the tray that held the engine pieces to the floor. This resulted in the damaging of the shell and the loss of number boards. The damage to the engine was one reason why I never went back to fixing the decoder installation after the fact.
Anyways, when it was time to install the decoder, I began by soldering the yellow and blue (the common return for lights) wires to the rear light board.

Then I soldered the orange and gray wires to the engine and wrapped it all in kapton tape.


Then, I modified the front light board per Digitrax’ instructions. I filed away the connection between the chassis lead and the lamp, and then soldered the common return (blue) to the lamp. I then clipped the resistor at the other end of the lamp and soldered the white wire to it. Finally I soldered the black and red wires to the tabs on the light board where it picks up the current from the chassis.


Wrapped kapton tape around the light circuit to make sure there wasn’t any shorts.

The decoder assembly is now ready to be put in the engine.

I also put some kapton tape around this little tab as I had stripped the wires going to the engine a little too much and was afraid that they might touch the chassis.

Then I put the engine in place.

And slid the front light board in place.

Aaaaaaand… dang! I cut the wires too short, and now the decoder doesn’t fit in the spot I had prepared for it!

But, I tested it and it worked fine, except the lights.

At this point, this engine was just a learning tool for me as I damaged it beyond repair. The shell doesn’t fit as snugly as it is damaged and the lights no longer function. But, it works and I still enjoy running it. The slow speed performance has improved dramatically with DCC.
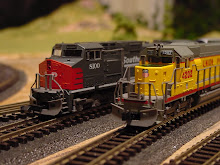
Just to compare, this is how the GP9 functioned pre-DCC. This is the engine running at the lowest throttle setting:

This is the same engine running on DCC:

Lots of lessons learned with this installation. Granted it didn’t go as smooth as I wanted, but hey, it’s my first decoder installation and I didn’t fry the decoder or the engine!


No comments:
Post a Comment