This one went a lot smoother than the GP-9 installation. This one does have a happy ending, and I hope you find this tutorialish (tutorially?) post helpful.
First of all, I think the appropriate, scratch that, I KNOW the appropriate decoder is CN-GP and not the CN for this locomotive. I happened to have TCS-CN decoders at hand, so I used that decoder instead of purchasing a new one. However, if you are going to buy a decoder for this locomotive, go with the CN-GP which is also what TCS recommends.
This is an older generation Atlas GP-40 with the separate front and rear light boards. The newer models with single boards have drop-in decoders instead. So, if you have an Atlas GP-40, first open it up to see what kind of boards you have on the locomotive before you order your decoder.
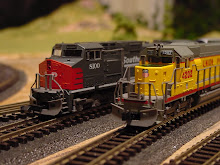
Ok, first off, let me introduce this engine. It is a beautiful GP-40 with the MKT paint scheme. It’s got a Kato engine in it and runs very smoothly. It has been one of my favorite engines.

This is what the engine looks like with the shell off. By the way, Fifer’s Hobby has a video about how to remove a loco shell, and by far it is the simplest way to remove the shell from an engine.

Here’s a side by side comparison of the CN decoder and the existing lighting boards. As you can see the CN decoder is a tad longer than the lighting board. I think the CN-GP is exactly the same length, which as I said above, is a better fit for this locomotive.

Here we are with all the parts disassembled and laid out. Make sure you mark the direction of the motor. I simply put a tiny mark on the top with a sharpie which was sufficient. Most decoder installation guides also tell you to note the direction of the trucks, but in this particular engine I didn’t see any difference in the trucks’ orientation. They looked quite symmetrical. But, just to be on the safe side, I laid them out the way they were pointing and kept them that way until the installation is completed.

The first thing you do is to solder the feeds to the motor (orange and gray). I shortened the wires to a length that looked like it would be enough to route them through the frame and stripped the ends. I snipped the brush tabs on the motor to be really short and then soldered the wires. The orange wire goes to the connection on the top and the gray one goes to the one on the bottom.

I planned to route the cables to the top, through the frame and straight up to the front. I held the cables in place and then wrapped the motor contacts with kapton tape to ensure the motor is insulated.

I then placed the motor in place. You can see in this picture how I plan to route the cables.

The decoder board is ever so slightly thicker than the light boards. So you’ll need to nudge these slots a little bit, but very gently. I mean really really gently. Just inserting the tip of a flathead screwdriver is probably going to be sufficient.

After that, I reassembled the frame, put the trucks in and inserted the decoder in the front light slot (which is where it needs to go)

And then I inserted the rear lighting circuit that came with the decoder in place and soldered the wires. The rear board has three pre-tinned tabs for the three wires from the decoder. You need to solder the blue wire to the left tab, the black wire to the middle and the yellow wire to the right tab. Here’s how the engine looked after all the soldering was done:

As I said above, the CN decoder is a tad longer than the original light board; it is designed to be installed in RS-2/RSC-2 engines. The black plastic that covers the inside of the cab wouldn’t fit in its slot as is, so I had to cut three little parts out to make it fit. Two from the sides and a groove in the front. The following two pictures show this modification. It was simple enough to do, but I’m guessing it would be unnecessary with a CN-GP decoder.


Here’s a final picture of the decoder in place.

At this point everything looked good. So I plopped the new engine on the track, dialed address 03 on the Zephyr, turned the track power on and POOOF! The decoder went up in a smoke. Dang!
Time to troubleshoot. At first I thought I failed to isolate the motor, but I checked it and it was just fine. As a matter of fact, everything looked fine. I was baffled for a moment there turning the frame in my hand over and over again when I noticed this:

The decoder had an IC on the bottom that was sticking down and it was in contact with the frame causing a short circuit! Oh boy. Well, at least I knew what the problem was and I had a second TCS CN laying around so I went back to work. I removed the burnt out decoder from the engine. Then I took the frame and filed the problematic spot a little bit. Just for good measure I also covered it with kapton tape.


As I was removing the old decoder and disassembling the frame I noticed that there was sufficient room to route the motor feed cables directly above the motor and through the front, directly to the decoder as opposed to going through to the top and then forward. Routing cables like this resulted in a much cleaner installation.

Time to test the installation again. I put the loco on the track held my breath and turned the track power on. Whew! Success!


Before I put the shell back on, I used two small strips of kapton tape to secure the three wires going to the rear board in place.

I found that when you are reinstalling the shell, it was simpler to push down the front first and then the rear. If you snap the rear in place first or if you push the whole shell down, the cab pops up. But if you first snap the front in place, you don’t have an issue. Probably if you mill a groove up top for the three wires you wouldn’t have that issue, but really it wasn’t a big deal. I didn’t have to force the shell in place.
And that’s it. Next up is another TCS CN series installation in an old Kato SD45.


Very helpful. I think I would have fallen into the trap of shorting out the decoder. I don't think, I know I would have!! Thanks for the tips.
ReplyDeletePete, Little Mountain, Australia