Ballasting track is one of the most dreaded tasks in this hobby. A majority of modelers see it as a necessary evil: everybody hates doing it, but we all agree that the beautiful look in the end is worth the hassle. One can find hundreds of resources on how to ballast on the Internet, including video tutorials. However, in general, ballasting your track consists of the following steps:
- Pour the ballast on the track.
- Using a stiff brush, push the ballast in between the ties and give it shape.
- Spray the whole ballasted area with wet water (water with a few drops of dish detergent in it) to set the ballast.
- Using an eye drop, slowly and patiently drop glue on the ballast.
- Spray the whole area with diluted glue (if necessary).
Well, just by reading this, you can tell that this is a tedious and messy process.
After spending over 2 hours just ballasting a corner of the small layout I’m working on right now, I stopped and said to myself “there’s got to be an easier way”. I analyzed the steps I listed above. Steps 1-2 are hard because the ballast doesn’t stay where you put it and it can blow away easily with a heavy sigh of frustration. Steps 3-5 are necessary just to make sure that all bits and pieces of the ballast actually come in contact with glue and they all stay down.
Then it occurred to me: why can’t I just mix the ballast with glue before I put it on the track?
I decided to try this on a piece of test track and it worked GREAT! Basically the steps are:
- Mix the ballast with glue (I used WS scenic cement).
- Put the ballast on the track.
Voila!
This really worked so well, I am actually excited about ballasting now!
Below is the whole process with lots of pictures. I hope others find this method useful as well.
-----------------
I started with this short piece of track glued on a piece of board.

Next I mixed the ballast with the glue. I used Woodland Scenics fine gray ballast and mixed that with the Woodland Scenics Scenic Cement. I don’t really have a ratio, but rather eyeballed it to get a consistency like wet sand. You really need to stir it more than you think to ensure that the ballast and the glue are mixed thoroughly.


I made the mistake of putting too much between the rails at first. This is after all what you do when you’re applying ballast with the conventional method; you put all your ballast in the middle, and as you go over it with the brush whatever spills over the rails is sufficient for the sides. Well, the mixture you get when you mix the glue beforehand doesn’t do that. So just apply very little between the rails. Just enough to fill the gaps between the ties. You’ll put the stuff for the sides directly outside the rails. Below is a picture of the ballast mixture applied before it’s shaped.


Here are two shots of the track after I was done giving it shape:


Then I let the whole thing dry overnight. In the morning, I used an exacto knife to remove a few bits of ballast that were sticking to the rails and then sanded the rails. The end result looked very good.


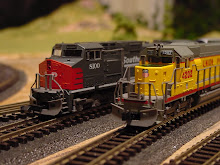
Just for comparison, here are pictures of this test track next to the section of my layout that I ballasted using the conventional method. Looks good either way, but premixing the ballast was a lot cleaner, easier and faster. (Note: the difference in color is because the ballast on the layout is light gray and the ballast on the test track is regular gray).


No comments:
Post a Comment