This is a long overdue follow-up to an earlier post I had on wiring Peco switch machines. In that post I covered how to wire Peco switch machines to a control panel using two green LEDs and a SPDT switch. In this post I’ll cover how to do the same thing using bicolor or bipolar LEDs. Another difference is that in part 1, the switch machines were mounted under the table. For this one, I mounted them directly on the turnout itself.
When you mount the switch machine directly to the turnout, you don’t have to do any alignment. It is tightly attached to the turnout and it doesn’t wiggle. The machine works reliably 100% of the time when you do it this way. Below are some pictures of a turnout prepared for installation with the PL-10 switch machine and the PL-13 accessory switch. The yellow lines drive the PL-10 and they’ll be connected to the SPDT. The blue wires from the PL-13 will be connected to the LEDs. The red wire is the common return.


The only drawback is that you have to carve a huge hole on your layout to accommodate the switch machine. It is hard to conceal this hole. I’ll cover the challenges on that in another post. For now, let’s focus on the wiring. Before I go any further though, I need to disclose the fact that I’m no electrical engineer. It took me a while to wrap my mind around this stuff, so everything I’ll describe below will be in plain English. So, if you’re an expert in electronics, take a moment to roll your eyes and go “aaaaarrrgghhh” to get it out of your system.
The wiring of the PL-10 itself doesn’t differ from my earlier post. You still have each terminal go to the two leads on your SPDT switch. But, let’s see how the bipolar LEDs fit in the picture. The bipolar LED is essentially a light emitting diode (LED) that emits green light when the current flows in one direction and red when it flows the other direction. Each bipolar LED will have two connections, a long one and a short one (they’re commonly referred to as cathode and anodes). We want one LED to be red while the other is green. So you want to wire the cathode of one LED to the anode of the other LED in serial; that is, solder a jumper wire between the short leg of one LED and the long leg of the other LED.
When you power these LEDs with DC, you’ll need to reverse the polarity of the circuit to change the color of the LED. I happen to use an AC power supply for driving my switch machines and the control panel lights. The difference between AC and DC can be summarized as this: with DC, current only flows in one direction, and with AC, current alternates directions incredibly fast. So how’s the bipolar LED going to handle this situation? We certainly don’t want these guys to blink red-green-red-green-red-green forever, or worse stay dark. So, we need to find a way to dam the current in one direction when the turnout is thrown one way and in the other direction when the turnout is thrown the other way. This is accomplished using a little device called a diode. A diode only lets current flow in one direction. So, by connecting one of the diodes to one terminal of the PL-13 and the other diode facing the opposite direction to the other terminal of PL-13, we can accomplish this. Before I babble on any longer, let me take you through the wiring schematic:

First let’s go over the SPDT and the wiring of the PL-10 really quick.
- The power supply (PSU) directly connects to the capacitor discharge unit (CDU). This is optional, but if you want to drive more than one switch machine at the same time, you have to have this.
- The red lead from the CDU is connected to a shorted terminal (all terminals is wired together using jumper plates, shown here with the line through the terminal). A red lead from this terminal goes to the neutral input of the SPDT
- The two outputs of the SPDT, shown here with the green lines, go to each terminal of the PL-10. I’ve shown them here going through a terminal block as that’s what I have. It’s not necessary; you can directly wire the SPDT to the PL-10. However, I found that the terminal block gives me a lot of flexibility and it is highly recommended.
- Then the PL-10’s common return goes back to the CDU (black wire).
Now let’s go over how the LEDs work in this scenario.
- A separate feed from the PSU (red wire) goes to a terminal strip that powers all the LEDs. You need to bypass the CDU for feeding the LEDs. This is because the CDU half-wave rectifies the output of the PSU. This means the LEDs will only light in one direction if you connect them to the feed from the CDU.
- You then take a feed from the red terminal strip and solder that to one of the legs of a bipolar LED.
- Then you solder the other leg of the first LED to the same leg of your second LED. For example, the schematic shows the two LEDs connected through their shorter legs.
- You then need to solder a resistor (the squiggly line in the schematic) to the free leg of the second LED. If you connect the LED directly to the PSU, you can fry it. You’ll need to use a resistor that is 680ohm.
- Now take a diode (the triangle with a line on its tip in the schematic), 1N4001 would work, and just solder it to the other end of the resistor.
- Take a second diode and also solder it to the resistor, but make sure that its direction is opposite of the first diode. Most diodes have a small marker on them showing their direction.
- Now you connect the free ends of the two diodes to the two terminals of the PL-13.
- Finally connect the return of the PL-13 to the common return.
Wiring a crossover is not much difficult. You need to add another LED and another PL-10. You’ll need to use jumper cables to connect the two green wires coming from the second PL-10’s terminals to those from the first PL-10 so you can control both with the same SPDT switch. Here’s what the schematic for that one looks like:

Ok, now that we covered all that, let’s go ahead and see what this looks like in the real world. The pictures that follow show how I wired a crossover.
I first soldered the three LEDs in serial, alternating the anodes and cathodes (short and long legs). The yellow cable in the picture goes to the PSU.

Next up, I prepared the resistor and the diodes. I took the two diodes, each facing one direction (as you can tell by the silver loop line on one end of the diode) and soldered the two to the resistor.

Then I soldered one of the leads to the PL-13 (the blue wire below).

I wrapped that in electrical tape all the way to the diode before I soldered the other lead (the second blue wire).

Then I soldered a wire to the LEDs (the blue wire) to be connected to the resistor/diode assembly.

Then I soldered the two together.

Next up, I soldered the wires from the PL-10 to the SPDT switch. Here in the picture, the middle yellow wire goes to the CDU and the two yellow wires on the outside go to the PL-10.


I then mounted the LED assembly and the SPDT to my control panel.

I ran the wires to the terminal strips. The longer strip on the left is where the PL-10 and PL-13 inputs are connected (in the schematic, the red terminal strip connected to the CDU and the green terminal strip), the longer strip on the right is the common returns (the black terminal strip), and the shorter strip is for the LEDs (the red terminal strip connected directly to the PSU).

Here’s a close-up shot showing how I used jumper wires to connect the feeds to two PL-10s.

And, here’s what the control panel looked like after the first crossover is fully wired:

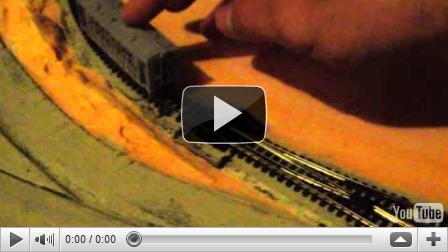
Here’s a video of the control panel test:
This is what it looks like today, with all the switches wired:

The entire LED-resistor-diode assembly can probably be made a lot cleaner and neater if one used a PC board. But, this was my first attempt and I didn’t really know what I was doing, so I went this way. Next layout, I probably will go with a circuit board.
Acknowledgements
I’d like to thank the members of nscale.net forums, especially TwinDad, for all their help with this project. It is a fantastic community of people with a wealth of information who are always willing to help.


Thanks for the great info. Can you explain how you control the polarity of the frog? Can this be done from the pl-13 at the same time?
ReplyDeleteThis is an excellent article, very helpfull indeed many, many thanks for taking the time and effort.
ReplyDeleteBomag
@Jeanene: I actually don't control the polarity of the frog because I use insulfrog switches. If you use electrofrog, you can indeed use the pl-13 to control polarity. If you want to do both polarity control and indicator lights, you may want to use relays.
ReplyDeleteAlso, if you're using DCC, you should check out the frogjuicer from tamvalleydepot.com. Looks like a very promising product and I plan on using it on my next layout.